1. 개요
블루투스 통신 모듈(HC-06, HC-05) 사용하기 글에서 구글 플레이 스토어에 등록되어 있는 애플리케이션을 다운로드하여 통신을 해보았다. 앞으로 스마트폰과 블루투스로 연동해서 하는 프로젝트에서는 RC 카 조종기 같은 조이스틱이나 원하는 버튼, 메뉴, 창 등을 원하는 대로 꾸며야 하는데 입맛을 모두 맞춘 애플리케이션을 찾기는 정말 힘들다. 없는 경우에 애플리케이션을 만들지 못한다면 프로젝트 자체가 불가능하다. 이 글에서는 앞으로 블루투스를 사용하여 진행할 프로젝트의 기반이 될 블루투스 어플을 만들 생각이다. 기능은 블루투스 검색, 연결, 데이터 송수신이며 추후 프로젝트에서 사용되는 기능을 이 글에 업데이트시킬 계획이다.
2. 안드로이드 블루투스
안드로이드 플랫폼은 블루투스 기능에 대한 지원이 포함되어 있어 다른 블루투스 장치와 통신할 수 있으며 블루투스 API 를 사용하여 블루투스 기능들을 구현할 수 있습니다. 블루투스 API는 "android.bluetooth" 패키지 아래 포함되어 있습니다.
2.1 블루투스 API 기능
블루투스 API 로 수행할 수 있는 작업은 다음과 같습니다..
- 블루투스 설정
- 블루투스 장치 스캔
- 블루투스 장치와 페어링하기
- 블루투스 장치 간 데이터 전송 및 수신
3. 애플리케이션 만들기
3.1 새 프로젝트 생성
새 프로젝트 생성은 안드로이드 스튜디오 설치하기 – 02. 프로그램 설치하기 글 안드로이드 스튜디오 프로젝트 생성하기 항목에서 확인할 수 있습니다. 이 글에서 프로젝트 이름은 "bluetooth" 로 하였습니다.
3.2 블루투스 권한 설정
안드로이드에서 블루투스 기능(연결 요청, 데이터 전송 등)을 사용하기 위해서는 "BLUETOOTH" 권한이 필요하며 애플리케이션이 기기 검색이나 블루투스 설정을 조작하기 위해서는 "BLUETOOTH_ADMIN" 권한이 필요합니다. "manifests" - "AndroidManifest.xml" 파일에 다음 코드를 추가해줍니다.
    <uses-permission android:name="android.permission.BLUETOOTH" />
    <uses-permission android:name="android.permission.BLUETOOTH_ADMIN" />
3.3 레이아웃 변경
이 애플리케이션에서는 4개의 버튼과 2개의 텍스트뷰를 생성합니다.
- 버튼 1 : 블루투스 활성화
- 버튼 2 : 블루투스 비활성화
- 버튼 3 : 블루투스 장치 연결
- 버튼 4 : 데이터 전송
- 텍스트뷰 1 : 블루투스 상태 확인
- 텍스트뷰 2 : 수신 데이터 표시
"res" - "layout" - "activity_main.xml" 파일에 다음 코드를 추가해줍니다.
<?xml version="1.0" encoding="utf-8"?>
<android.support.constraint.ConstraintLayout xmlns:android="http://schemas.android.com/apk/res/android"
    xmlns:app="http://schemas.android.com/apk/res-auto"
    xmlns:tools="http://schemas.android.com/tools"
    android:layout_width="match_parent"
    android:layout_height="match_parent"
    tools:context=".MainActivity">

    <Button
        android:id="@+id/btnBluetoothOn"
        android:layout_width="wrap_content"
        android:layout_height="wrap_content"
        android:layout_marginStart="30dp"
        android:layout_marginLeft="30dp"
        android:layout_marginTop="30dp"
        android:text="블루투스 ON"
        app:layout_constraintStart_toStartOf="parent"
        app:layout_constraintTop_toTopOf="parent" />

    <Button
        android:id="@+id/btnBluetoothOff"
        android:layout_width="wrap_content"
        android:layout_height="wrap_content"
        android:layout_marginStart="8dp"
        android:layout_marginLeft="8dp"
        android:text="블루투스 OFF"
        app:layout_constraintStart_toEndOf="@+id/btnBluetoothOn"
        app:layout_constraintTop_toTopOf="@+id/btnBluetoothOn" />

    <TextView
        android:id="@+id/tvBluetoothStatus"
        android:layout_width="170dp"
        android:layout_height="20dp"
        android:layout_marginTop="10dp"
        android:text="status"
        app:layout_constraintStart_toStartOf="@+id/btnBluetoothOn"
        app:layout_constraintTop_toBottomOf="@+id/btnBluetoothOn" />

    <Button
        android:id="@+id/btnConnect"
        android:layout_width="wrap_content"
        android:layout_height="0dp"
        android:layout_marginTop="10dp"
        android:text="연결하기"
        app:layout_constraintStart_toStartOf="@+id/tvBluetoothStatus"
        app:layout_constraintTop_toBottomOf="@+id/tvBluetoothStatus" />

    <TextView
        android:id="@+id/tvReceiveData"
        android:layout_width="wrap_content"
        android:layout_height="wrap_content"
        android:layout_marginTop="10dp"
        android:text="Receive"
        app:layout_constraintStart_toStartOf="@+id/btnSendData"
        app:layout_constraintTop_toBottomOf="@+id/btnSendData" />

    <Button
        android:id="@+id/btnSendData"
        android:layout_width="wrap_content"
        android:layout_height="wrap_content"
        android:layout_marginTop="10dp"
        android:text="전송"
        app:layout_constraintStart_toStartOf="@+id/btnConnect"
        app:layout_constraintTop_toBottomOf="@+id/btnConnect" />

    <EditText
        android:id="@+id/tvSendData"
        android:layout_width="wrap_content"
        android:layout_height="wrap_content"
        android:layout_marginStart="8dp"
        android:layout_marginLeft="8dp"
        android:ems="10"
        android:inputType="textPersonName"
        android:text="Send Data"
        app:layout_constraintStart_toEndOf="@+id/btnSendData"
        app:layout_constraintTop_toTopOf="@+id/btnSendData" />

</android.support.constraint.ConstraintLayout>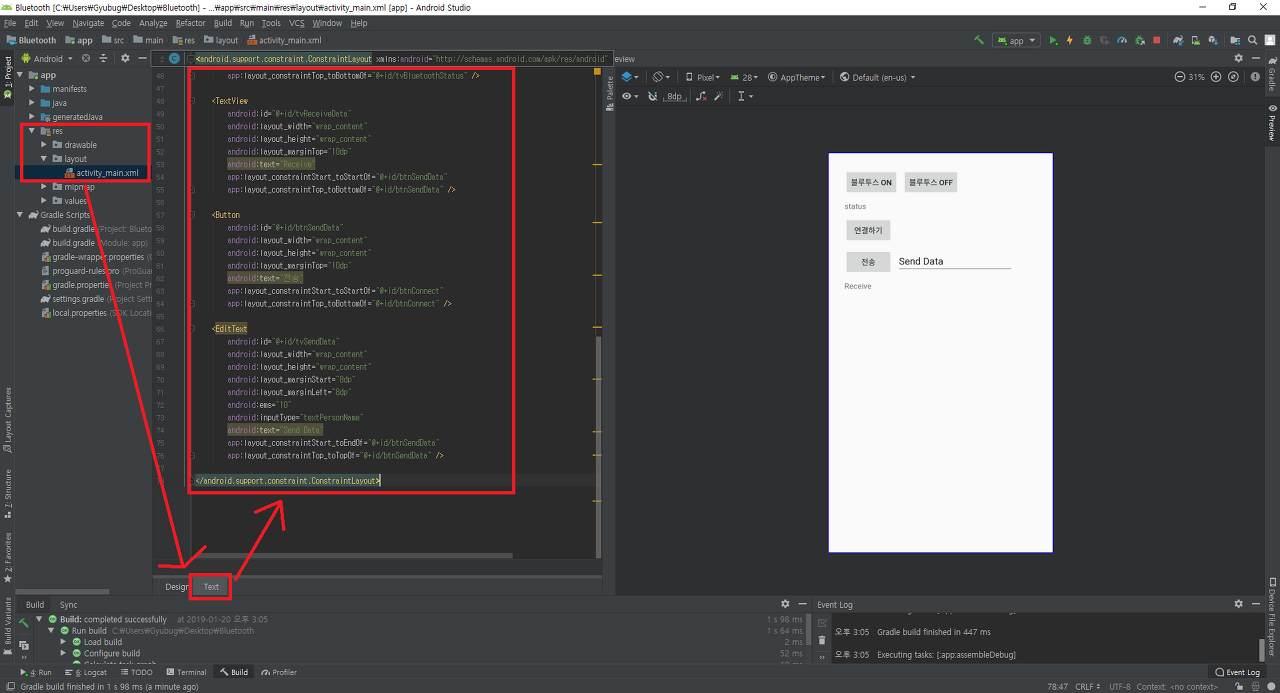
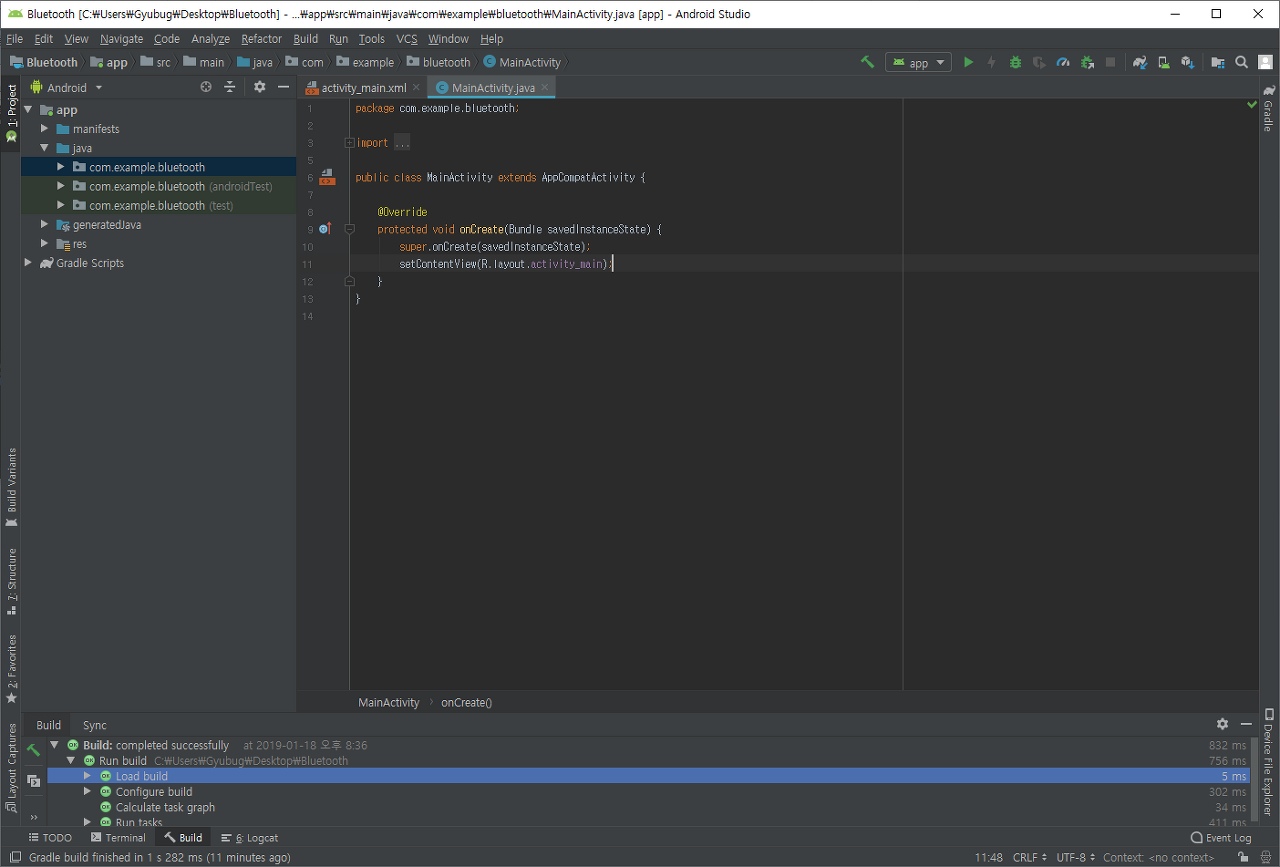
이 상태로 애플리케이션을 빌드 및 실행하면 다음과 같은 애플리케이션이 만들어집니다.

3.4 소스코드 작성
블루투스 애플리케이션을 사용하기 급급하다면 이 코드를 바로 사용하면 됩니다. 코드에 대한 설명은 다음 항목에서 각 부분 별로 설명하였습니다.
package com.example.bluetooth;

import android.bluetooth.BluetoothAdapter;
import android.bluetooth.BluetoothDevice;
import android.bluetooth.BluetoothSocket;
import android.content.DialogInterface;
import android.content.Intent;
import android.os.Bundle;
import android.os.Handler;
import android.os.SystemClock;
import android.support.v7.app.AlertDialog;
import android.support.v7.app.AppCompatActivity;
import android.view.View;
import android.widget.Button;
import android.widget.EditText;
import android.widget.TextView;
import android.widget.Toast;

import java.io.IOException;
import java.io.InputStream;
import java.io.OutputStream;
import java.io.UnsupportedEncodingException;
import java.util.ArrayList;
import java.util.List;
import java.util.Set;
import java.util.UUID;

public class MainActivity extends AppCompatActivity {
    TextView mTvBluetoothStatus;
    TextView mTvReceiveData;
    TextView mTvSendData;
    Button mBtnBluetoothOn;
    Button mBtnBluetoothOff;
    Button mBtnConnect;
    Button mBtnSendData;

    BluetoothAdapter mBluetoothAdapter;
    Set<BluetoothDevice> mPairedDevices;
    List<String> mListPairedDevices;

    Handler mBluetoothHandler;
    ConnectedBluetoothThread mThreadConnectedBluetooth;
    BluetoothDevice mBluetoothDevice;
    BluetoothSocket mBluetoothSocket;

    final static int BT_REQUEST_ENABLE = 1;
    final static int BT_MESSAGE_READ = 2;
    final static int BT_CONNECTING_STATUS = 3;
    final static UUID BT_UUID = UUID.fromString("00001101-0000-1000-8000-00805F9B34FB");

    @Override
    protected void onCreate(Bundle savedInstanceState) {
        super.onCreate(savedInstanceState);
        setContentView(R.layout.activity_main);

        mTvBluetoothStatus = (TextView)findViewById(R.id.tvBluetoothStatus);
        mTvReceiveData = (TextView)findViewById(R.id.tvReceiveData);
        mTvSendData =  (EditText) findViewById(R.id.tvSendData);
        mBtnBluetoothOn = (Button)findViewById(R.id.btnBluetoothOn);
        mBtnBluetoothOff = (Button)findViewById(R.id.btnBluetoothOff);
        mBtnConnect = (Button)findViewById(R.id.btnConnect);
        mBtnSendData = (Button)findViewById(R.id.btnSendData);

        mBluetoothAdapter = BluetoothAdapter.getDefaultAdapter();


        mBtnBluetoothOn.setOnClickListener(new Button.OnClickListener() {
            @Override
            public void onClick(View view) {
                bluetoothOn();
            }
        });
        mBtnBluetoothOff.setOnClickListener(new Button.OnClickListener() {
            @Override
            public void onClick(View view) {
                bluetoothOff();
            }
        });
        mBtnConnect.setOnClickListener(new Button.OnClickListener() {
            @Override
            public void onClick(View view) {
                listPairedDevices();
            }
        });
        mBtnSendData.setOnClickListener(new Button.OnClickListener() {
            @Override
            public void onClick(View view) {
                if(mThreadConnectedBluetooth != null) {
                    mThreadConnectedBluetooth.write(mTvSendData.getText().toString());
                    mTvSendData.setText("");
                }
            }
        });
        mBluetoothHandler = new Handler(){
            public void handleMessage(android.os.Message msg){
                if(msg.what == BT_MESSAGE_READ){
                    String readMessage = null;
                    try {
                        readMessage = new String((byte[]) msg.obj, "UTF-8");
                    } catch (UnsupportedEncodingException e) {
                        e.printStackTrace();
                    }
                    mTvReceiveData.setText(readMessage);
                }
            }
        };
    }
    void bluetoothOn() {
        if(mBluetoothAdapter == null) {
            Toast.makeText(getApplicationContext(), "블루투스를 지원하지 않는 기기입니다.", Toast.LENGTH_LONG).show();
        }
        else {
            if (mBluetoothAdapter.isEnabled()) {
                Toast.makeText(getApplicationContext(), "블루투스가 이미 활성화 되어 있습니다.", Toast.LENGTH_LONG).show();
                mTvBluetoothStatus.setText("활성화");
            }
            else {
                Toast.makeText(getApplicationContext(), "블루투스가 활성화 되어 있지 않습니다.", Toast.LENGTH_LONG).show();
                Intent intentBluetoothEnable = new Intent(BluetoothAdapter.ACTION_REQUEST_ENABLE);
                startActivityForResult(intentBluetoothEnable, BT_REQUEST_ENABLE);
            }
        }
    }
    void bluetoothOff() {
        if (mBluetoothAdapter.isEnabled()) {
            mBluetoothAdapter.disable();
            Toast.makeText(getApplicationContext(), "블루투스가 비활성화 되었습니다.", Toast.LENGTH_SHORT).show();
            mTvBluetoothStatus.setText("비활성화");
        }
        else {
            Toast.makeText(getApplicationContext(), "블루투스가 이미 비활성화 되어 있습니다.", Toast.LENGTH_SHORT).show();
        }
    }
    @Override
    protected void onActivityResult(int requestCode, int resultCode, Intent data) {
        switch (requestCode) {
            case BT_REQUEST_ENABLE:
                if (resultCode == RESULT_OK) { // 블루투스 활성화를 확인을 클릭하였다면
                    Toast.makeText(getApplicationContext(), "블루투스 활성화", Toast.LENGTH_LONG).show();
                    mTvBluetoothStatus.setText("활성화");
                } else if (resultCode == RESULT_CANCELED) { // 블루투스 활성화를 취소를 클릭하였다면
                    Toast.makeText(getApplicationContext(), "취소", Toast.LENGTH_LONG).show();
                    mTvBluetoothStatus.setText("비활성화");
                }
                break;
        }
        super.onActivityResult(requestCode, resultCode, data);
    }
    void listPairedDevices() {
        if (mBluetoothAdapter.isEnabled()) {
            mPairedDevices = mBluetoothAdapter.getBondedDevices();

            if (mPairedDevices.size() > 0) {
                AlertDialog.Builder builder = new AlertDialog.Builder(this);
                builder.setTitle("장치 선택");

                mListPairedDevices = new ArrayList<String>();
                for (BluetoothDevice device : mPairedDevices) {
                    mListPairedDevices.add(device.getName());
                    //mListPairedDevices.add(device.getName() + "\n" + device.getAddress());
                }
                final CharSequence[] items = mListPairedDevices.toArray(new CharSequence[mListPairedDevices.size()]);
                mListPairedDevices.toArray(new CharSequence[mListPairedDevices.size()]);

                builder.setItems(items, new DialogInterface.OnClickListener() {
                    @Override
                    public void onClick(DialogInterface dialog, int item) {
                        connectSelectedDevice(items[item].toString());
                    }
                });
                AlertDialog alert = builder.create();
                alert.show();
            } else {
                Toast.makeText(getApplicationContext(), "페어링된 장치가 없습니다.", Toast.LENGTH_LONG).show();
            }
        }
        else {
            Toast.makeText(getApplicationContext(), "블루투스가 비활성화 되어 있습니다.", Toast.LENGTH_SHORT).show();
        }
    }
    void connectSelectedDevice(String selectedDeviceName) {
        for(BluetoothDevice tempDevice : mPairedDevices) {
            if (selectedDeviceName.equals(tempDevice.getName())) {
                mBluetoothDevice = tempDevice;
                break;
            }
        }
        try {
            mBluetoothSocket = mBluetoothDevice.createRfcommSocketToServiceRecord(BT_UUID);
            mBluetoothSocket.connect();
            mThreadConnectedBluetooth = new ConnectedBluetoothThread(mBluetoothSocket);
            mThreadConnectedBluetooth.start();
            mBluetoothHandler.obtainMessage(BT_CONNECTING_STATUS, 1, -1).sendToTarget();
        } catch (IOException e) {
            Toast.makeText(getApplicationContext(), "블루투스 연결 중 오류가 발생했습니다.", Toast.LENGTH_LONG).show();
        }
    }

    private class ConnectedBluetoothThread extends Thread {
        private final BluetoothSocket mmSocket;
        private final InputStream mmInStream;
        private final OutputStream mmOutStream;

        public ConnectedBluetoothThread(BluetoothSocket socket) {
            mmSocket = socket;
            InputStream tmpIn = null;
            OutputStream tmpOut = null;

            try {
                tmpIn = socket.getInputStream();
                tmpOut = socket.getOutputStream();
            } catch (IOException e) {
                Toast.makeText(getApplicationContext(), "소켓 연결 중 오류가 발생했습니다.", Toast.LENGTH_LONG).show();
            }

            mmInStream = tmpIn;
            mmOutStream = tmpOut;
        }
        public void run() {
            byte[] buffer = new byte[1024];
            int bytes;

            while (true) {
                try {
                    bytes = mmInStream.available();
                    if (bytes != 0) {
                        SystemClock.sleep(100);
                        bytes = mmInStream.available();
                        bytes = mmInStream.read(buffer, 0, bytes);
                        mBluetoothHandler.obtainMessage(BT_MESSAGE_READ, bytes, -1, buffer).sendToTarget();
                    }
                } catch (IOException e) {
                    break;
                }
            }
        }
        public void write(String str) {
            byte[] bytes = str.getBytes();
            try {
                mmOutStream.write(bytes);
            } catch (IOException e) {
                Toast.makeText(getApplicationContext(), "데이터 전송 중 오류가 발생했습니다.", Toast.LENGTH_LONG).show();
            }
        }
        public void cancel() {
            try {
                mmSocket.close();
            } catch (IOException e) {
                Toast.makeText(getApplicationContext(), "소켓 해제 중 오류가 발생했습니다.", Toast.LENGTH_LONG).show();
            }
        }
    }
}
3.5 소스코드 분석
3.5.1 패키지 Import
package com.example.bluetooth;프로젝트를 생성할 때 입력해준 본인의 패키지 명과 일치시켜줘야 합니다.
import android.bluetooth.BluetoothAdapter;
import android.bluetooth.BluetoothDevice;
import android.bluetooth.BluetoothSocket;
import android.content.DialogInterface;
import android.content.Intent;
import android.os.Bundle;
import android.os.Handler;
import android.os.SystemClock;
import android.support.v7.app.AlertDialog;
import android.support.v7.app.AppCompatActivity;
import android.view.View;
import android.widget.Button;
import android.widget.EditText;
import android.widget.TextView;
import android.widget.Toast;

import java.io.IOException;
import java.io.InputStream;
import java.io.OutputStream;
import java.io.UnsupportedEncodingException;
import java.util.ArrayList;
import java.util.List;
import java.util.Set;
import java.util.UUID;
블루투스 애플리케이션을 만드는데 필요한 패키지들을 Import 하는 부분입니다. 미리 Import 할 필요 없이 코딩을 하다 보면 자동으로 또는 Alt+Enter 키로 삽입할 수 있습니다.
3.5.2 메인 액티비티 시작 및 onCreate() 메서드
public class MainActivity extends AppCompatActivity {
    TextView mTvBluetoothStatus;
    TextView mTvReceiveData;
    TextView mTvSendData;
    Button mBtnBluetoothOn;
    Button mBtnBluetoothOff;
    Button mBtnConnect;
    Button mBtnSendData;

    BluetoothAdapter mBluetoothAdapter;
    Set<BluetoothDevice> mPairedDevices;
    List<String> mListPairedDevices;

    Handler mBluetoothHandler;
    ConnectedBluetoothThread mThreadConnectedBluetooth;
    BluetoothDevice mBluetoothDevice;
    BluetoothSocket mBluetoothSocket;

    final static int BT_REQUEST_ENABLE = 1;
    final static int BT_MESSAGE_READ = 2;
    final static int BT_CONNECTING_STATUS = 3;
    final static UUID BT_UUID = UUID.fromString("00001101-0000-1000-8000-00805F9B34FB");
애플리케이션 메인 액티비티의 시작 부분으로 메인 액티비티에서 사용될 전역 변수, 객체, 상수를 선언하는 부분입니다. 이 애플리케이션은 "스마트폰" - "아두이노" 간 데이터 전송을 위해 작성하였으며 "스마트폰" - "스마트폰" 간 데이터 전송을 하고 싶은 분들은 49줄의 부분을 다음처럼 바꿔줘야 합니다.
    @Override
    protected void onCreate(Bundle savedInstanceState) {
        super.onCreate(savedInstanceState);
        setContentView(R.layout.activity_main);

        mTvBluetoothStatus = (TextView)findViewById(R.id.tvBluetoothStatus);
        mTvReceiveData = (TextView)findViewById(R.id.tvReceiveData);
        mTvSendData =  (EditText) findViewById(R.id.tvSendData);
        mBtnBluetoothOn = (Button)findViewById(R.id.btnBluetoothOn);
        mBtnBluetoothOff = (Button)findViewById(R.id.btnBluetoothOff);
        mBtnConnect = (Button)findViewById(R.id.btnConnect);
        mBtnSendData = (Button)findViewById(R.id.btnSendData);
메인 액티비티가 최초 생성될 때 호출되는 onCreate()이며 전역으로 선언한 버튼, 텍스트 뷰를 findViewById 메서드를 통하여 참조시킵니다.
mBluetoothAdapter = BluetoothAdapter.getDefaultAdapter();getDefaultAdapter 메서드는 해당 장치가 블루투스 기능을 지원하는지 알아오는 메서드입니다. 최초 생성될 때 값을 mBluetoothAdapter에 저장하며 이후 bluetoothOn() 메서드에서 사용됩니다.
        mBtnBluetoothOn.setOnClickListener(new Button.OnClickListener() {
            @Override
            public void onClick(View view) {
                bluetoothOn();
            }
        });
        mBtnBluetoothOff.setOnClickListener(new Button.OnClickListener() {
            @Override
            public void onClick(View view) {
                bluetoothOff();
            }
        });
        mBtnConnect.setOnClickListener(new Button.OnClickListener() {
            @Override
            public void onClick(View view) {
                listPairedDevices();
            }
        });
        mBtnSendData.setOnClickListener(new Button.OnClickListener() {
            @Override
            public void onClick(View view) {
                if(mThreadConnectedBluetooth != null) {
                    mThreadConnectedBluetooth.write(mTvSendData.getText().toString());
                    mTvSendData.setText("");
                }
            }
        });
위에서 생성한 버튼들이 클릭되었을 때 발생하는 이벤트를 구현한 리스너입니다. 버튼을 눌렀을 때 동작할 함수들은 아래서 설명합니다.
        mBluetoothHandler = new Handler(){
            public void handleMessage(android.os.Message msg){
                if(msg.what == BT_MESSAGE_READ){
                    String readMessage = null;
                    try {
                        readMessage = new String((byte[]) msg.obj, "UTF-8");
                    } catch (UnsupportedEncodingException e) {
                        e.printStackTrace();
                    }
                    mTvReceiveData.setText(readMessage);
                }
            }
        };
블루투스 핸들러로 블루투스 연결 뒤 수신된 데이터를 읽어와 ReceiveData 텍스트 뷰에 표시해주는 부분입니다. 아래서 블루투스 스레드(ConnectedBluetoothThread)가 선언되고 나서 다시 보면 좀 더 이해하기 쉽습니다.
3.5.3 블루투스 활성화 메서드
    void bluetoothOn() {
        if(mBluetoothAdapter == null) {
            Toast.makeText(getApplicationContext(), "블루투스를 지원하지 않는 기기입니다.", Toast.LENGTH_LONG).show();
        }
        else {
            if (mBluetoothAdapter.isEnabled()) {
                Toast.makeText(getApplicationContext(), "블루투스가 이미 활성화 되어 있습니다.", Toast.LENGTH_LONG).show();
                mTvBluetoothStatus.setText("활성화");
            }
            else {
                Toast.makeText(getApplicationContext(), "블루투스가 활성화 되어 있지 않습니다.", Toast.LENGTH_LONG).show();
                Intent intentBluetoothEnable = new Intent(BluetoothAdapter.ACTION_REQUEST_ENABLE);
                startActivityForResult(intentBluetoothEnable, BT_REQUEST_ENABLE);
            }
        }
    }
블루투스 ON 버튼을 누르면 동작하는 메서드로 최초에 "mBluetoothAdapter == null" 통하여 블루투스를 지원하는 기기인지 아닌지 판별할 수 있습니다. 지원하지 않는다면 finish() 같은 메서드로 애플리케이션을 종료하는 등의 작업을 수행할 수 있습니다. 지원하는 기기라면 블루투스가 활성화 되어 있는지 아닌지 또한 isEnabled() 메소드로 확인하여 각각에 따른 기능을 넣어주었습니다. 비활성화 되어 있다면 Intent 를 이용하여 활성화 창을 띄워 onActivityResult 에서 결과를 처리하게끔 하였습니다.
3.5.4 블루투스 비활성화 메소드
    void bluetoothOff() {
        if (mBluetoothAdapter.isEnabled()) {
            mBluetoothAdapter.disable();
            Toast.makeText(getApplicationContext(), "블루투스가 비활성화 되었습니다.", Toast.LENGTH_SHORT).show();
            mTvBluetoothStatus.setText("비활성화");
        }
        else {
            Toast.makeText(getApplicationContext(), "블루투스가 이미 비활성화 되어 있습니다.", Toast.LENGTH_SHORT).show();
        }
    }
블루투스를 비활성화하는 메서드입니다. disable(); 메소드를 통하여 블루투스를 비활성화 할수 있으며 그 외 코드는 블루투스 활성화 메소드랑 거의 비슷하니 따로 설명하지 않겠습니다.
3.5.5 블루투스 활성화 결과를 위한 onActivityResult 메소드
    @Override
    protected void onActivityResult(int requestCode, int resultCode, Intent data) {
        switch (requestCode) {
            case BT_REQUEST_ENABLE:
                if (resultCode == RESULT_OK) { // 블루투스 활성화를 확인을 클릭하였다면
                    Toast.makeText(getApplicationContext(), "블루투스 활성화", Toast.LENGTH_LONG).show();
                    mTvBluetoothStatus.setText("활성화");
                } else if (resultCode == RESULT_CANCELED) { // 블루투스 활성화를 취소를 클릭하였다면
                    Toast.makeText(getApplicationContext(), "취소", Toast.LENGTH_LONG).show();
                    mTvBluetoothStatus.setText("비활성화");
                }
                break;
        }
        super.onActivityResult(requestCode, resultCode, data);
    }
블루투스 ON 메서드에서 Intent로 받은 결과를 처리하는 메서드(?)입니다. 블루투스 활성화 창에서 확인을 누르면 mTvBluetoothStatus 텍스트뷰에 "활성화"를 취소를누르면 "비활성화"를 표시하게끔 처리하였습니다.
3.5.6 블루투스 페어링 장치 목록 가져오는 메소드
    void listPairedDevices() {
        if (mBluetoothAdapter.isEnabled()) {
우선 블루투스가 활성화 상태인지 확인하고
            if (mPairedDevices.size() > 0) {
                AlertDialog.Builder builder = new AlertDialog.Builder(this);
                builder.setTitle("장치 선택");

                mListPairedDevices = new ArrayList();
                for (BluetoothDevice device : mPairedDevices) {
                    mListPairedDevices.add(device.getName());
                    //mListPairedDevices.add(device.getName() + "\n" + device.getAddress());
                }
페어링 된 장치가 존재한다면 새로운 알람창 객체를 생성하여 알람창에 "장치선택" 타이틀과 각 페어링된 장치명을 추가해줍니다.
                final CharSequence[] items = mListPairedDevices.toArray(new CharSequence[mListPairedDevices.size()]);
                mListPairedDevices.toArray(new CharSequence[mListPairedDevices.size()]);

                builder.setItems(items, new DialogInterface.OnClickListener() {
                    @Override
                    public void onClick(DialogInterface dialog, int item) {
                        connectSelectedDevice(items[item].toString());
                    }
                });
페어링된 장치 수를 얻어와서 각 장치를 누르면 장치 명을 매개변수로 사용하여 connectSelectedDevice 메서드로 전달해주는 클릭 이벤트를 추가해주었습니다.
                AlertDialog alert = builder.create();
                alert.show();
위에서 리스트로 추가된 알람 창을 실제로 띄워줍니다.
            } else {
                Toast.makeText(getApplicationContext(), "페어링된 장치가 없습니다.", Toast.LENGTH_LONG).show();
            }
        }
        else {
            Toast.makeText(getApplicationContext(), "블루투스가 비활성화 되어 있습니다.", Toast.LENGTH_SHORT).show();
        }
150 번째 줄과 153 번째 줄에 대응하여 페어링 된 장치가 없는 조건과 블루투스가 비활성화된 조건에 대해 메시지를 띄워주는 코드입니다.
3.5.7 블루투스 연결하는 메서드
    void connectSelectedDevice(String selectedDeviceName) {
        for(BluetoothDevice tempDevice : mPairedDevices) {
            if (selectedDeviceName.equals(tempDevice.getName())) {
                mBluetoothDevice = tempDevice;
                break;
            }
        }
실제로 블루투스 장치와 연결하는 부분입니다. 우리가 listPairedDevices 메서드를 통하여 전달받은 매개변수 값은 장치 이름입니다. 우리가 연결에 필요한 값은 장치의 주소로 for 문으로 페어링 된 모든 장치를 검색을 하면서 매개 변수 값과 비교하여 같다면 그 장치의 주소 값을 얻어옵니다.
        try {
            mBluetoothSocket = mBluetoothDevice.createRfcommSocketToServiceRecord(BT_UUID);
            mBluetoothSocket.connect();
            mThreadConnectedBluetooth = new ConnectedBluetoothThread(mBluetoothSocket);
            mThreadConnectedBluetooth.start();
            mBluetoothHandler.obtainMessage(BT_CONNECTING_STATUS, 1, -1).sendToTarget();
        } catch (IOException e) {
            Toast.makeText(getApplicationContext(), "블루투스 연결 중 오류가 발생했습니다.", Toast.LENGTH_LONG).show();
        }
    }
mBluetoothDevice를 통해 createRfcommSocketToServiceRecord(UUID)를 호출하여 mBluetoothSocket을 가져옵니다. (여기서 사용된 UUID 값은 시리얼 통신용입니다.) 그러면 mBluetoothDevice에 연결될 mBluetoothSocket이 초기화되며 그 후 connect()를 호출하여 연결을 시작합니다. 이후는 스레드에 대해 지식을 요구함으로 지식이 없다면 많이 해깔릴테니 집중하시길 바랍니다. 우리가 블루투스를 연결하고 데이터를 전송할 때는 우리가 원하는 때에 전송하면 됩니다. 하지만 데이터는 언제 수신받을 지 몰라 데이터 수신을 위한 쓰레드를 따로 만들어서 처리해야 합니다. 그에 따라 mBluetoothSocket 를 매개변수로 mThreadConnectedBluetooth 쓰레드를 생성해줍니다.
3.5.8 ConnectedBluetoothThread 쓰레드
    private class ConnectedBluetoothThread extends Thread {
        private final BluetoothSocket mmSocket;
        private final InputStream mmInStream;
        private final OutputStream mmOutStream;
ConnectedBluetoothThread 스레드의 시작이며 이 스레드에서 사용할 전역 객체들을 선언하였습니다. 위에서 사용한 소켓이 이미 메인 액티비티 자체의 소켓이니 그대로 사용해도 되지만 쓰레드 내부 자체에서만 사용할 소켓 객체를 추가하였습니다.
        public ConnectedBluetoothThread(BluetoothSocket socket) {
            mmSocket = socket;
            InputStream tmpIn = null;
            OutputStream tmpOut = null;

            try {
                tmpIn = socket.getInputStream();
                tmpOut = socket.getOutputStream();
            } catch (IOException e) {
                Toast.makeText(getApplicationContext(), "소켓 연결 중 오류가 발생했습니다.", Toast.LENGTH_LONG).show();
            }

            mmInStream = tmpIn;
            mmOutStream = tmpOut;
        }
쓰레드 초기화 과정입니다. getInputStream()와 getOutputStream()을 사용하여 소켓을 통한 전송을 처리하는 InputStream 및 OutputStream을 가져옵니다. 간단하게 말하자면 데이터 전송 및 수신하는 길을 만들어주는 작업입니다.
        public void run() {
            byte[] buffer = new byte[1024];
            int bytes;

            while (true) {
                try {
                    bytes = mmInStream.available();
                    if (bytes != 0) {
                        SystemClock.sleep(100);
                        bytes = mmInStream.available();
                        bytes = mmInStream.read(buffer, 0, bytes);
                        mBluetoothHandler.obtainMessage(BT_MESSAGE_READ, bytes, -1, buffer).sendToTarget();
                    }
                } catch (IOException e) {
                    break;
                }
            }
        }
수신받은 데이터는 언제 들어올지 모르니 항상 확인해야 합니다. 그에 따라 while 반복문 처리로 데이터가 존재한다면 데이터를 읽어오는 작업을 해줍니다.
        public void write(String str) {
            byte[] bytes = str.getBytes();
            try {
                mmOutStream.write(bytes);
            } catch (IOException e) {
                Toast.makeText(getApplicationContext(), "데이터 전송 중 오류가 발생했습니다.", Toast.LENGTH_LONG).show();
            }
        }
데이터 전송을 위한 ConnectedBluetoothThread 스레드의 메서드로 88, 89번째 줄에서 사용하였습니다.
        public void cancel() {
            try {
                mmSocket.close();
            } catch (IOException e) {
                Toast.makeText(getApplicationContext(), "소켓 해제 중 오류가 발생했습니다.", Toast.LENGTH_LONG).show();
            }
        }
블루투스 소켓을 닫는 메서드입니다. 애플리케이션을 닫으면 어차피 자동으로 닫아지니 여기서 따로 사용할 일은 없겠습니다. 이것으로 블루투스 애플리케이션의 코드 설명을 마칩니다. 다음 글에서는 애플리케이션이 켜지면 자동으로 블루투스 활성화 및 페어링 목록이 뜨며 빠르게 연결하는 방법에 대해 소개합니다.
댓글